User Tools
Site Tools
Table of Contents
Pi-hole in LXC container
In this guide we will describe the steps necessary to install and setup a working pi-hole inside a LXC container on a NetModule router. The guide will be divided into 2 sections.
- Setup virtualization for installing pi-hole container on NetModule router
- Setup router to configure the DHCP server using pi-hole as DNS
Usecases of Pi-hole
Pi-hole can be used to block unwanted content on network level before it even reaches your browser. This is accomplished by using pi-hole as the primary DNS in your network. Every device that uses the router for internet access will benefit from this. By default the adlist will update automatically every sunday. Some of the key features of pi-hole are:
- - Protection from adds and trackers
- - Displaying statistical data about clients on the dashboard
- - Use as DHCP server for your network
- - Whitelist/Blacklist feature (supports filtering via regex)
- - Management of clients and groups of clients
- - Adding custom adlists and mangement of those
For a complete documentation of the full feature set you can visit https://docs.pi-hole.net/.
Setup LXC Pi-hole virtualization
The configuration has been accomplished and verifed with the following software versions:
| Software version | 4.9.0.102 |
| Alpine version | 3.15.0 |
| Kernel version | 5.15.147 |
We will not take any responsiblity or support whether this configuration will work with different versions.
Before we can start please check if virtualization feature is licensed on your system (see SYSTEM → Licensing on WebGUI).
Step 1: First we need a working WAN connecton to the Internet. Make sure DNS names get resolved correctly.
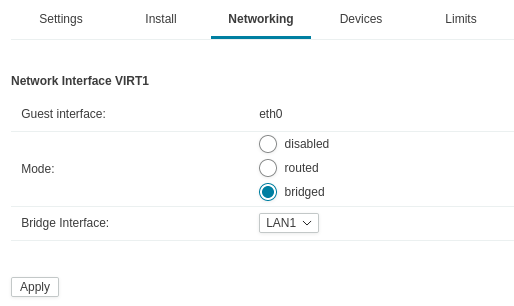
Step 2: On the Web-GUI navigate to SYSTEM → Virtualization and click the small plus icon to create a new virtualization. Here we navigate to the Networking tab and pick bridged. We leave the interface at LAN1 and click the Apply button.
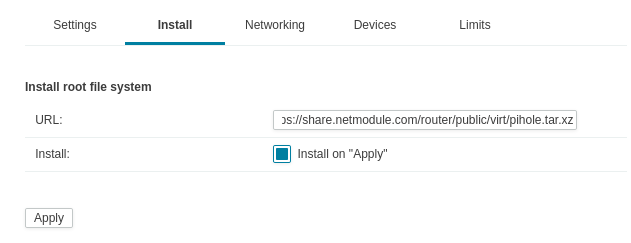
Step 3: We switch to the Install tab and paste the following link “https://share.netmodule.com/router/public/virt/pihole.tar.xz” to the URL field. Also check the box for Install on “Apply”, then hit the Apply button. Now is the right time to grab a coffee or tea, this step can take some time to compelte (around 2 minutes).
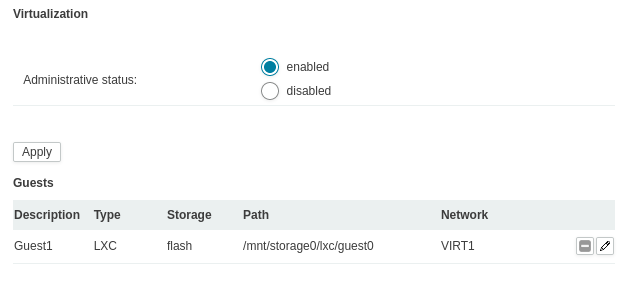
Step 4: We are now back at the Virtualization main page and set the Administrative status to enabled then hit the Apply button one more time.
Setup router DHCP/DNS
We are now back at the router Web-GUI to do the final setup of the DHCP server and DNS settings.
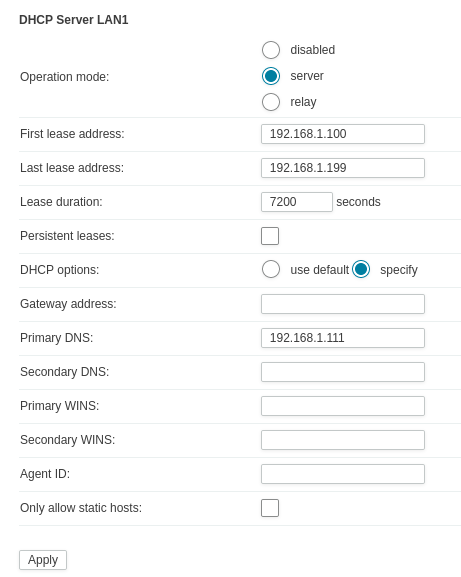
Step 1: Navigate to SERVICES → DHCP Server and click the Edit button. Pick the specify radio button which will make some additional input windows pop up. Here you have to put the address you want the pi-hole to server to have in the Primary DNS field. Note that the address will have to be within the range of the DHCP server settings, for example 192.168.1.111, then click Apply.
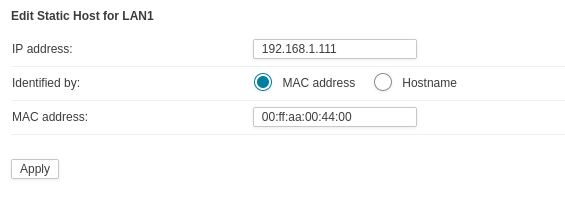
Step 2: Click the Edit button one more time so we can setup the pi-hole as static host. Once again we click the small plus icon and set IP address to the one you picked earlier (192.168.1.111 in my case) and MAC address to 00:ff:aa:00:44:00 (this is the MAC address of eth0 inside the LXC virtualization).
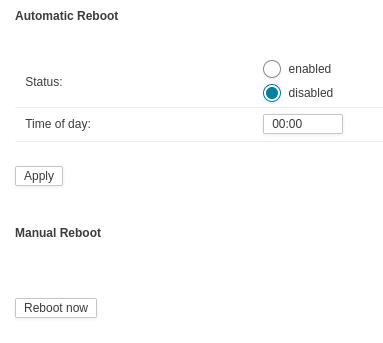
Step 3: To finalize the setup do a reboot of the router. You can do this by navigating to SYSTEM → Reboot and the hit the Reboot Now button or alternatively just run the reboot command in terminal.
Step 4: To verify that everything is working correctly open then pi-hole web interface login page by visiting http://192.168.1.111/admin/index.php?login with your browser. The default admin password after installation is “admin01”. We strongly recommend to change the password after verifying sucessfull installation. (see next step)
Step 5: To change the password we need to access the router with command line interface. Log in via ssh, telnet or serial connection and then run the command “lxc-attach guest0”“ to enter the shell in LXC, then run the command ”pihole -a -p“ for changing the password.
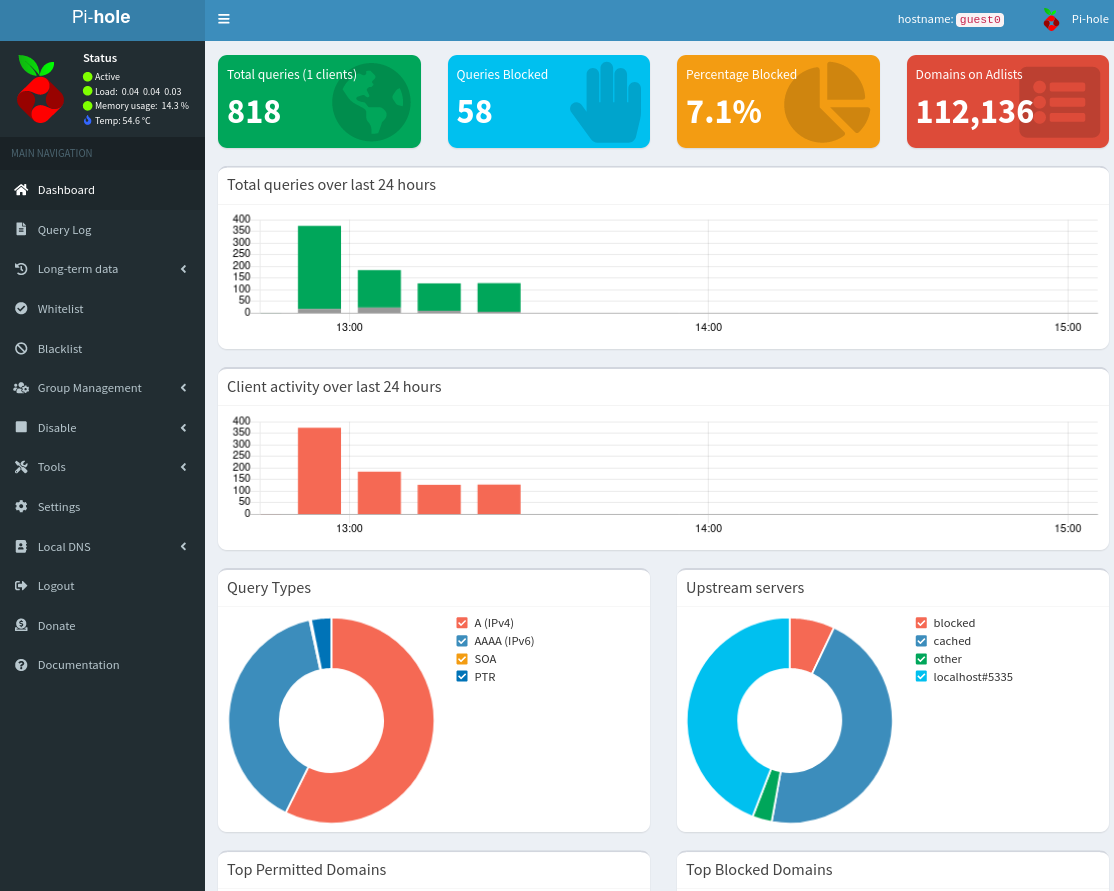
The installation is finished and Pi-hole is now in working condition. You can access the webgui on 192.168.1.111 any time and view the dashboard or login to adjust settings.


