User Tools
Site Tools
Table of Contents
How to set up a File Server
Goal
This Article describes how to install a file server on NetModule Routers.
This setup contains the installation and configuration of the vsftpd FTP server, the Net2FTP web frontend for vsftpd, and Samba shares. In addition, a way is shown to transfer files from an USB stick to your container.
Prerequisites
- NetModule Wireless Router with wireless connection
- NetModule Software 4.9.0.102 or newer
- A license is required for the LXC container
- Not available for legacy products NB1600, NB2700, NB3700, NB3710
1. Setting up an LXC container and then implementing File Server
The link below takes you to a wiki that describes how to install and set up an LXC container on a NetModule router.
* Set up an LXC container / set-up-lxc
Once the LXC container is installed, we can install additional components from the file server.
Store a local domain with a static IP address
If your network setup doesn't include a domain you could use on your router, you can easily create one you can use to access your file server.
For this, get access to the routers web interface and go to Services → DNS Server. Under “Static Hosts” , click on the plus symbol to add a new domain name.
Now enter the IP address and the domain name you want it linked to and click “Apply”
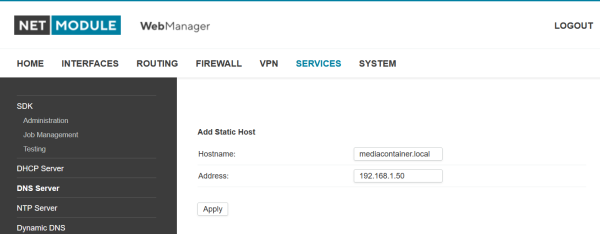
After this, your configuration should look like this:
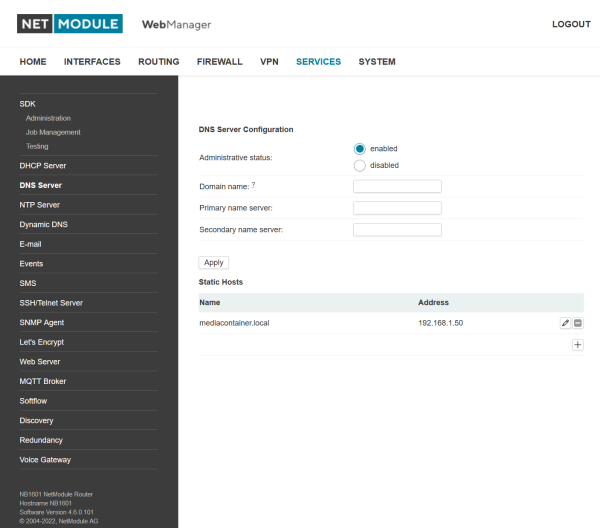
Now you can access the file server with both its IP address a its local domain name.
2. The vsftpd FTP server
Vsftpd (Very Secure File Transfer Protocol Deamon) is a very compact and secure FTP server. It provides a high amount of data security and user management features.
To install the program, use
apt-get install vsftpd
In the first step, a new user account is created. This user is only for file transfer purposes, so he needs no further rights and no shell access on the machine. In this case, this user is calles “ftpuser”. To create this user, type
adduser ftpuser --shell /bin/false/
and give this new user a password with which you can later login to your FTP server:
passwd ftpuser
In the next step, the new non-existing shell must be told to the system. To do this, enter
nano /etc/shells
and in a new line add
- /etc/shells
/bin/false
After that, create new folders whrere you can store your media files. In this example, these folders are created in the /home directory, but you are totally free to create them elsewhere. In addition, all necessary rights are given to that folders:
mkdir -p /home/Media
mkdir /home/Media/ Bilder Videos Musik
chmod 755 /home/Media
chmod 777 /home/Media Bilder Videos Musik
If you want to encrypt your connections to your file server and don't have any SSL keys available you could import, you can easily create some on your own. For this, use
openssl req -x509 -nodes -days 365 -newkey rsa:2048 -keyout /etc/ssl/private/vsftpd.key -out /etc/ssl/private/vsftpd.pem
to create a pair of keys. In this configuration, these keys have a 2048bit strong encryption and a runtime of 365 days, but you can change these setting on your needs.
You are about to be asked to enter information that will be incorporated into your certificate request. What you are about to enter is what is called a Distinguished Name or a DN. There are quite a few fields but you can leave some blank For some fields there will be a default value, If you enter '.', the field will be left blank.
Country Name (2 letter code) [AU]:DE State or Province Name (full name) [Some-State]:Hessen Locality Name (eg, city) []:Eschborn Organization Name (eg, company) [Internet Widgits Pty Ltd]:NetModule GmbH Organizational Unit Name (eg, section) []:Test Common Name (e.g. server FQDN or YOUR name) []:mediacontainer.local Email Address []: root@LXC_MEDIA:~#
While the certificates are created, you can answer every question as you wish, but be aware that at “common name”, you enter the name of your (local) domain on your router, otherwise clients using these certificates will provide an error message.
The main configuration of vsftpd is made in the /etc/vsftpd.conf file. Here you can see a exemplary configuration:
- /etc/vsftpd.conf
userlist_enable=YES
userlist_deny=NO
local_root=/home/Media
allow_writeable_chroot=YES
#force_ssl_enable=YES
force_local_data_ssl=YES
force_local_logins_ssl=YES
ssl_ciphers=HIGH
ssl_enable=YES
rsa_cert_file=/etc/ssl/private/vsftpd.pem
rsa_private_key_file=/etc/ssl/private/vsftpd.key
listen=YES
listen_ipv6=NO
anonymous_enable=NO
local_enable=YES
write_enable=YES
In the /etc/passwd file, you have to correct the home path of the ftpuser to the path where the media folders are located:
- /etc/passwd
ftpuser:x:1000:1000:,,,:/home/Media:/bin/false
In the last step, you have to add the ftpuser to the /etc/vsftpd.user_list file to use him for logins to the FTP server:
3) Net2FTP
Net2FTP is a web interface for FTP servers. With this, you can up-and download files to your server just with your web browser and without the need of additional tools like FileZilla.
First, you have to download the Software from this Site (net2ftp_v1.3.zip, 6MB). After unzipping the folder, you now have a folder named “filed_to_upload”. Rename this folder to a name you want to access your file server later (e.g. FTPserver).
In the next step, you have to install a web server and PHP in your container:
apt-get install apache2
apt-get install php7.0-common php7.0-fpm php7.0-cli php7.0-json php7.0-mysql php7.0-curl php7.0-intl php7.0-mcrypt php-pear php7.0-gd php7.0-zip php7.0-xml php7.0-mbstring php-imagick libapache2-mod-php7.0
After this, upload your downloaded and renamed folder to your web servers default location (e.g. /var/www/html). Now you can access the FTP server over the name of this folder (For example, if your domain is mediacontainer.local and you renamed the folder to ftpserver, you can access it via http://mediacontainer.local/ftpserver).
You also have to change the rights of the temp folder in your uploaded folder. Fot this, go to this folder and type
chmod 777 temp
Now you can also configure some settings to improve the performance of your system, especially with the size of files you want to up- or download.
The first setting is in the net2ftp files itself. Enter
nano /var/www/html/ftpserver/settings.inc.php
Here you can change the parameters you want, in this example the following setting were changed:
- /var/www/html/ftpserver/settings.inc.php
$net2ftp_settings["max_filesize"]  = "10000000000";
$net2ftp_settings["check_consumption"] = "no";
The next setting are made in the web server (Apache) settings. Enter
nano /etc/php/7.0/apache2/php.ini
and change the following settings:
- /etc/php/7.0/apache2/php.ini
upload_max_filesize = 10G
post_max_size = 11G
memory_limit = -1
max_execution_time = 9600
max_input_time = 3600
The last settings have to be made in the /etc/apache2/apache2.conf file:
- /etc/apache2/apache2.conf
LimitRequestBody 0
Now restart your web server with
/etc/init.d/apache2 restart
4) The samba file server
With samba, you can easily share your folders and files from other computers with Windows, Linux or macOS installed.
In the first step, install the samba server with some additional tools:
apt-get install samba-common samba tdb-tools
If you want, you can create a new user for logging in to the server, but you can also use the ftpuser created earlier for the use with samba. In this case, you have to set a new password for him:
smbpasswd -a ftpuser
The main configuration file for samba is the /etc/samba/smb.conf. Here you can set up folders where your files shall be stored at after the upload. In this example, the folders created earlier a used for this. Open the file with an editor of your choice and add the following lines at its end:
- c/etc/samba/smb.conf
[Fotos]
path = /home/Media/Bilder
writeable = yes

[Videos]
path = /home/Media/Videos
writeable = yes

[Musik]
path = /home/Media/Musik
writeable = yes
After you finished your setup, type
testparm
to check if your samba configuration contains any errors.
Press enter to see a dump of your service definitions
# Global parameters [global]
      log file = /var/log/samba/log.%m
      max log size = 1000
      syslog = 0
      panic action = /usr/share/samba/panic-action %d
      usershare allow guests = Yes
      map to guest = Bad User
      obey pam restrictions = Yes
      pam password change = Yes
      passwd chat = *Enter\snew\s*\spassword:* %n\n *Retype\snew\s*\spassword:* %n\n *password\supdated\ssuccessfully* .
      passwd program = /usr/bin/passwd %u
      server role = standalone server
      unix password sync = Yes
      dns proxy = No
      idmap config * : backend = tdb
[homes]
      comment = Home Directories
      browseable = No
      create mask = 0700
      directory mask = 0700
      valid users = %S
[printers]
      comment = All Printers
      path = /var/spool/samba
      browseable = No
      printable = Yes
      create mask = 0700
[print$]
      comment = Printer Drivers
      path = /var/lib/samba/printers
[Fotos]
      path = /home/Media/Bilder
      read only = No
[Videos]
      path = /home/Media/Videos
      read only = No
[Musik]
      path = /home/Media/Musik
      read only = No
In the last step, type
service smbd restart
to restart the samba server.
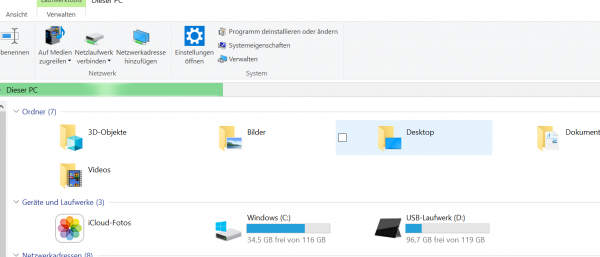
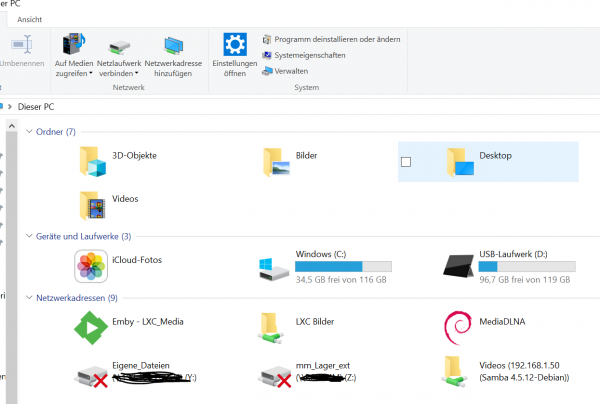
To add the shared folders to your Windows machine, go to “This PC (Arbeitsplatz)” and click on “Add a network location (Netzwerkadresse hinzufügen)”.
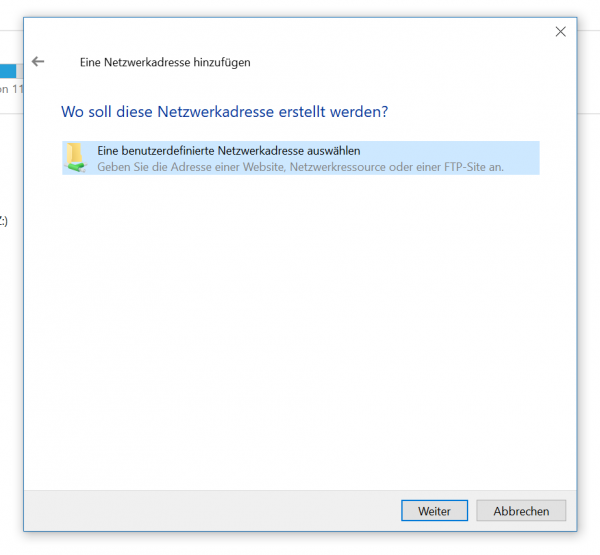
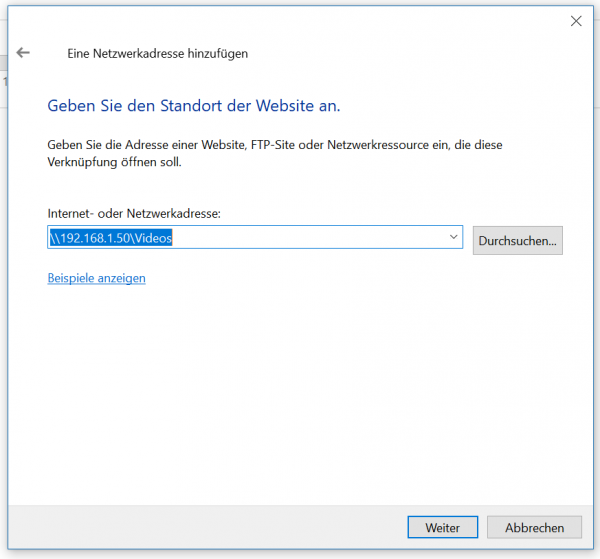
In the next window, click on “Choose a custom network location (Eine benutzerdefinierte Netzwerkadresse hinzufügen).
Now enter the address of your shared folder in the form “\\IP_Adress_or_domain_name\shared_folder”.
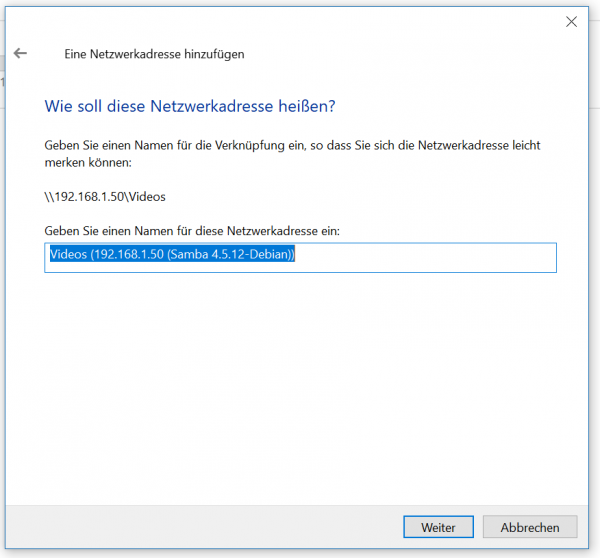
In the next window, enter a name for your shared folder.
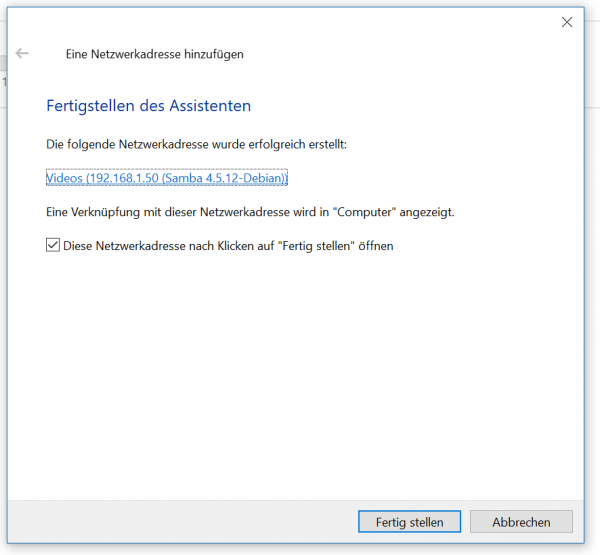
Now click on “Finish” and your shared folder is accessible over your Windows machine.
5) transfer files with an USB Stick
The next possibelity to copy files to your router is by using an USB Stick.
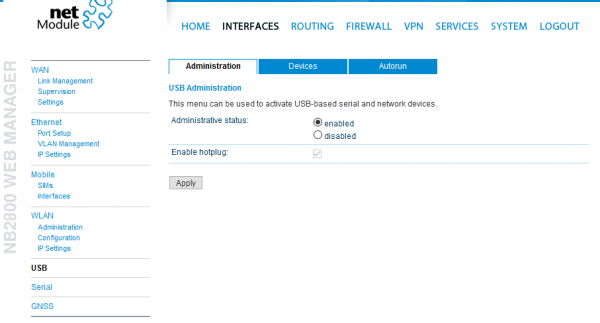
For this, go to Interfaces → USB → Administration and set the “Administrative status” on “enabled”.
Next, go to “Autorun” and again set the Administrative status on “enabled”. Also, download the “autorun.key” file from this site.
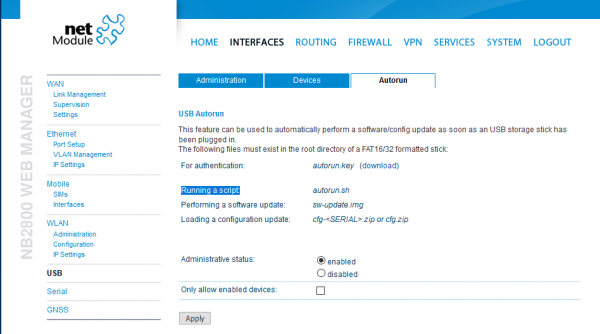 This file contains the hash values of the password the user uses to login to the router. So this file is necessary automatically run actions with root level access.
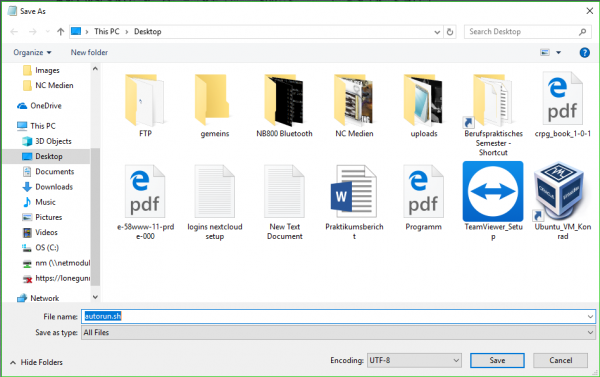
In the next step you have to create the “autorun.sh” file. This file contains the tasks which are run when the stick is plugged into the router. To create this file under windows, open the Editor, create a new file and fill it with the code you want it to run. Then, go to “Save As”, enter “autorun.sh” under “File Name” and make sure you choose “All Files” under “Save as type”. Also, make sure u select “UTF-8” in the Encoding drop-down menu. Now click on “Save” to save the file.
In this example, files located in folders on the stick (Video-trans, Audio-trans, Bilder-trans) are copied to folders inside of the LXC Container (/home/Media/Videos Bilder Musik). Existing files are being ignored. The /mnt/media/autorun path is the path where the USB stick is mounted to; be aware that this path is not changeable.
In the second example, all files in the container will be replaced by the files stored on the USB stick. You will get an one-to-one copy of your USB stick:
Now format an USB stick to the FAT16 oder FAT32 file format. Copy to it the “autorun.key” file together with the “autorun.sh” file and the files/folders you want to transfer.
If you now plug in the stick into the router, the stick is mounted to the file system and all tasks from the “autrorun.sh” file are run.
