User Tools
Site Tools
Table of Contents
How to set up a NB2800 File Server
This Article describes how to install a file server on the NB2800 router.
If you need instructions on how to set up a LXC Container on NB2800 Routers, you can refer to this page: LXC Virtualization.
This setup contains the installation and configuration of the vsftpd FTP server, the Net2FTP web frontend for vsftpd, and Samba shares. In addition, a way is shown to transfer files from an USB stick to your container:
1) Preparations
In the first step, download the [LXC container image LINK] which provides all needed programs and a default configuration.
If your network setup doesn't include a domain you could use on your router, you can easily create one you can use to access your file server.
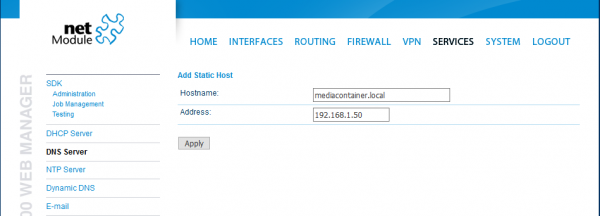
For this, get access to the routers web interface and go to Services → DNS Server. Under “Static Hosts” , click on the plus symbol to add a new domain name.
Now enter the IP address and the domain name you want it linked to and click “Apply”
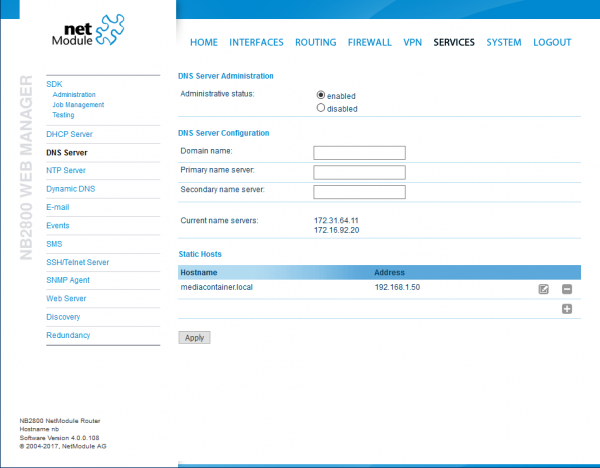
After this, your configuration should look like this:
Now you can access the file server with both its IP address and its local domain name.
For logging in to vsftpd/Net2FTP and Samba, a default user with password was created to easily give access to the programs. The user name used here is “ftpuser” and the password is “mediac0ntr0l” (both without the quotes; be aware that the “0” used in the password are zeros). This configuration is used because this user is setup without any access to any other part of the system; so he has neither a shell access nor any login abilities. You can change the given password by using
sudo passwd USERNAME
. On default, all transfered files are saved in the “/home/Media/Bilder Videos Musik” folders.
2) Net2FTP
Net2FTP is a web interface for FTP servers. With this, you can up-and download files to your server just with your web browser and without the need of additional tools like FileZilla.
You can access the FTP server over the IP address or domain name of your router and the addon /ftpserver (For example, if your local domain name is mediacontainer.local you can access it via http://mediacontainer.local/ftpserver).
3) The VSFTPD FTP Server
Vsftpd is a very smooth working FTP server. You can access it by using a FTP client program like FileZilla, or you can access it via your web browser using Net2FTP as described above.
If you have changed the user for vsftpd, you have to tell the program about the new user. To do this open the /etc/vsftpd.user_list file with an editor (nano, vi,…). In this file, add your preferred user in a new line:
4) The Samba file server
With samba, you can easily share your folders and files from other computers with Windows, Linux or macOS installed.
In Samba, the login credentials described in the vsftpd chapter are used again to get access to Samba. If you want to add a new user to Samba, enter
smbpasswd -a <username>
After this, you are asked to give a new password to this new user. Be aware that while entering this new password, no placeholder like * are shown.
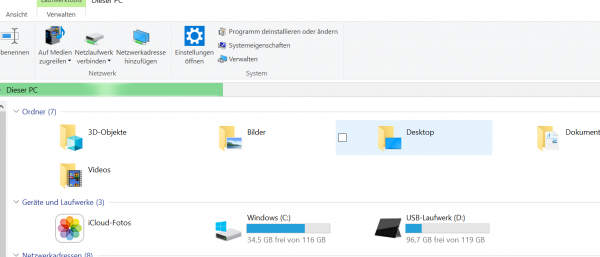
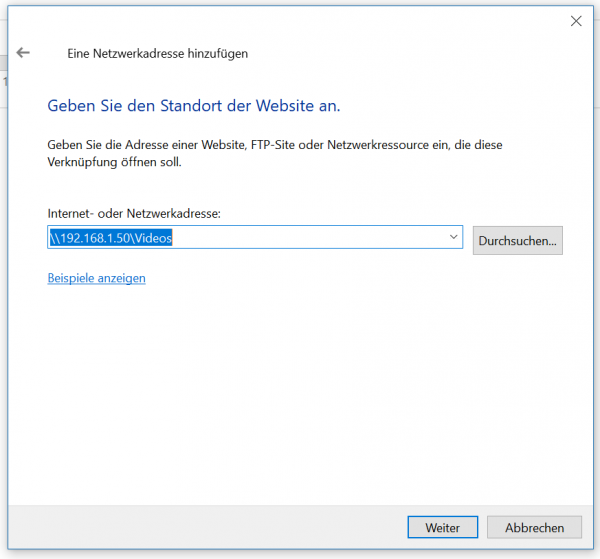
To add the shared folders to your Windows machine, go to “This PC (Arbeitsplatz)” and click on “Add a network location (Netzwerkadresse hinzufügen)”.
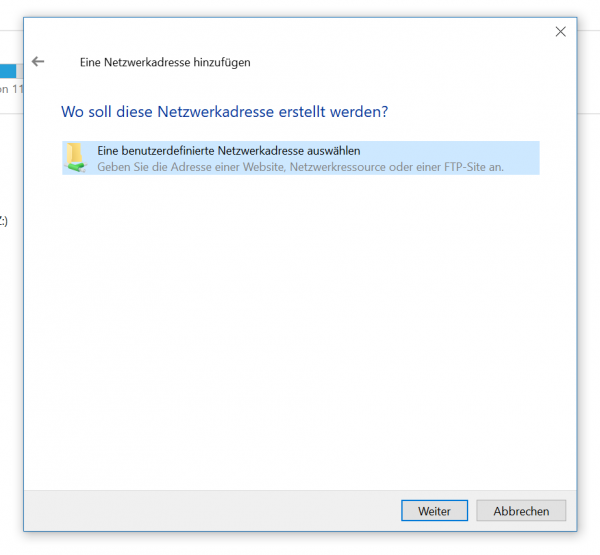
In the next window, click on “Choose a custom network location (Eine benutzerdefinierte Netzwerkadresse hinzufügen).
Now enter the address of your shared folder in the form “\\IP_Adress_or_domain_name\shared_folder”.
In the next window, enter a name for your shared folder.
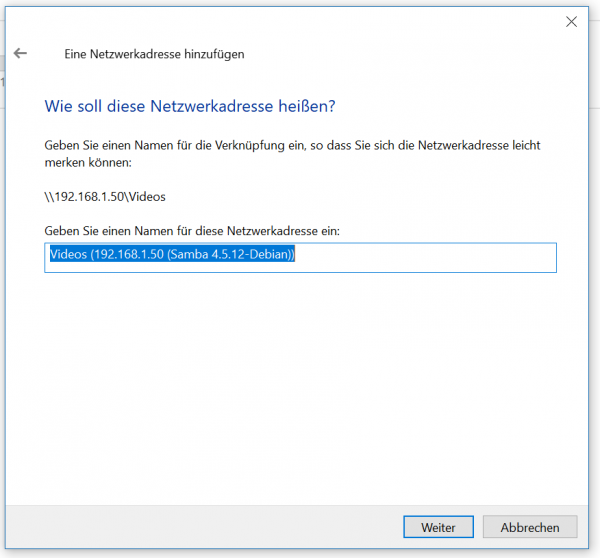
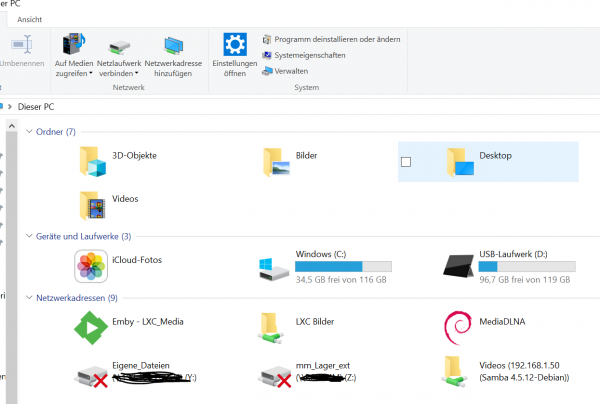
Now click on “Finish” and your shared folder is accessible over your Windows machine.

5) transfer files with an USB Stick
The next possibelity to copy files to your router is by using an USB Stick.
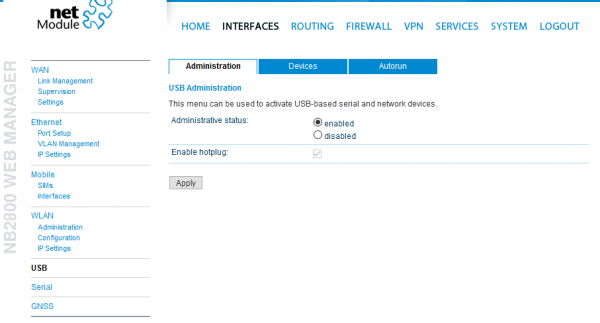
For this, go to Interfaces → USB → Administration and set the “Administrative status” on “enabled”.
Next, go to “Autorun” and again set the Administrative status on “enabled”. Also, download the “autorun.key” file from this site.
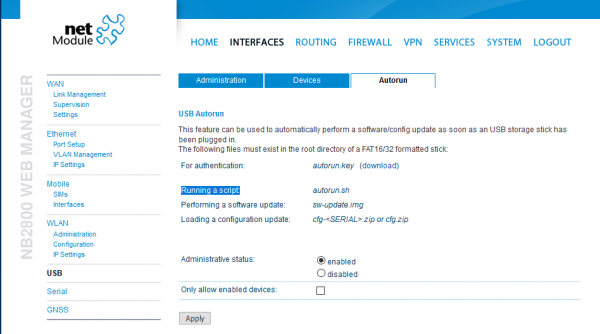
This file contains the hash values of the password the user uses to login to the router. So this file is necessary automatically run actions with root level access.
In this example [LINK], files located in folders on the stick (Video-trans, Audio-trans, Bilder-trans) are copied to folders inside of the LXC Container (/home/Media/Videos Bilder Musik). Existing files are being ignored. The /mnt/media/autorun path is the path where the USB stick is mounted to; be aware that this path is not changeable.
In the second example [LINK], all files in the container will be replaced by the files stored on the USB stick. You will get an one-to-one copy of your USB stick.
The last example [LINK] provides the possibility to use an external USB drive as a storage solution for your media players provided in a LXC container. This external drive will be mounted to the /home/Media/USB folder. You can add this folder to the media player of your choice to let it get access to the media files stored in it. Be aware that the used LXC container will be restarted afterwards.
Now format an USB stick to the FAT16 oder FAT32 file format. Copy to it the “autorun.key” file together with the “autorun.sh” file and the files and folders (Video-trans, Audio-trans, Bilder-trans) you want to transfer.
If you now plug in the stick into the router, the stick is mounted to the file system and all tasks from the “autrorun.sh” file are run.