User Tools
Site Tools
This is an old revision of the document!
How to install an LXC container
The following describes the current options on how to setup and install an LXC container onto a Netmodule router.
First of all you need a licence for virtualisation on your router. Once that is ensured you can enable virtualisation on the router and setup an example container. This documents describes the two ways (manual & automatic) used to setup a container.
Prerequisites:
- Netmodule Router and a virtualisation licence
- LXC container for arm architecture (armhf)
Resources:
Manual Setup
- Download the container
- Open GUI and go to System → Virtualization
- Click + to add container
- By settings, choose type, create a description and select storage. Root file system will be set automatically
- If you want to enable networking, go to “Networking”, select routed or bridged by the Network Interface and press Apply
- You should see a following screen (if you chose extended storage, the path will have storage1 instead of storage0:
/mnt/storage1/lxc/guest0)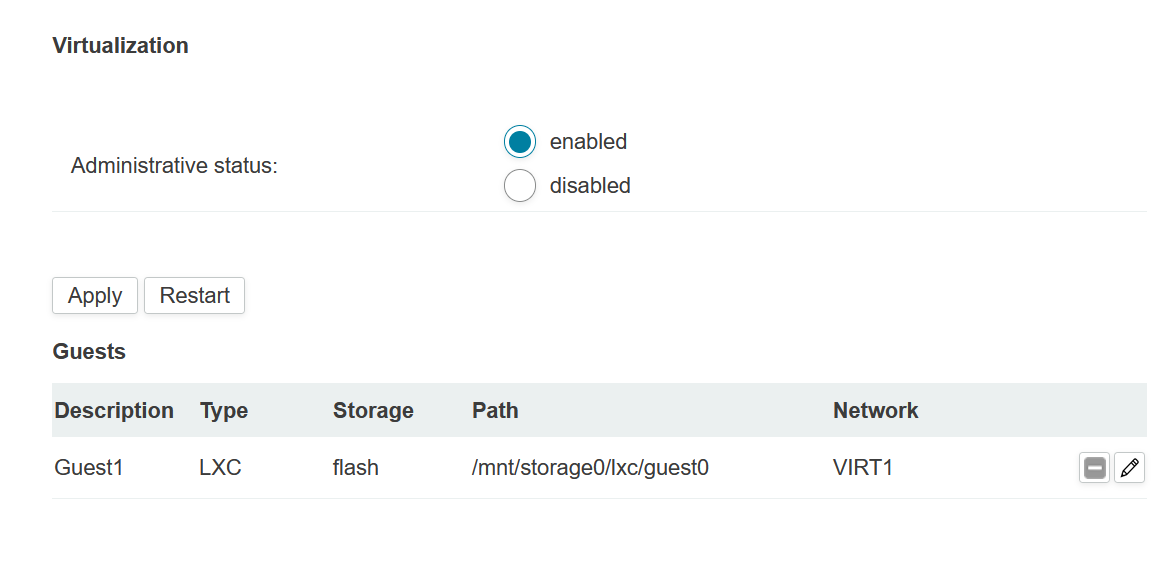
- Transfer the downloader container (you can use WinSCP) to the router and put in
/mnt/storage0/lxc - Unpack the container:
tar –xvJf Ubuntu-Xenial.tar.xz –C ./guest0
- Check access rights using
ls –l
- If the created folder has rights 644, change them* to 755:
chmod 755 -R guest0
- The extracted container contains rootfs directory. You need to copy the content of it to the specified root file system. Go to jessie folder:
cd guest0/lxc/jessie
- Type
lxc-start –n guest0
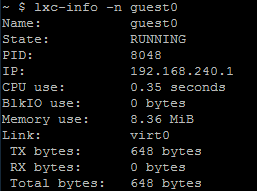
- Information about container can be accesed by typing
lxc-info –n guest0
- Now you can attach to the container by typing
lxc-attach –n guest0


* Later you should remove executable permission bits from some system files, start container in foreground mode
lxc-start –F –n guest0
to get more Information