User Tools
Site Tools
This is an old revision of the document!
Table of Contents
Virtualization
Virtualization gives customers the possiblity to execute their own applications. Usage of containers allows to isolate the applications and the entire OS images from the other processes which are running on a host system.
This tutorial shows how to get started with it using LXC container.
Prerequisites
NetModule Router NB2800
Configuration
- Download the container
- Open GUI and go to System → Virtualization
- Click + to add container
- By settings, choose type, create a description and select storage. Root file system will be set automatically
- If you want to enable networking, go to “Networking”, select routed or bridged by the Network Interface and press Apply
- You should see a following screen (if you chose extended storage, the path will have storage1 instead of storage0:
/mnt/storage1/lxc/guest0)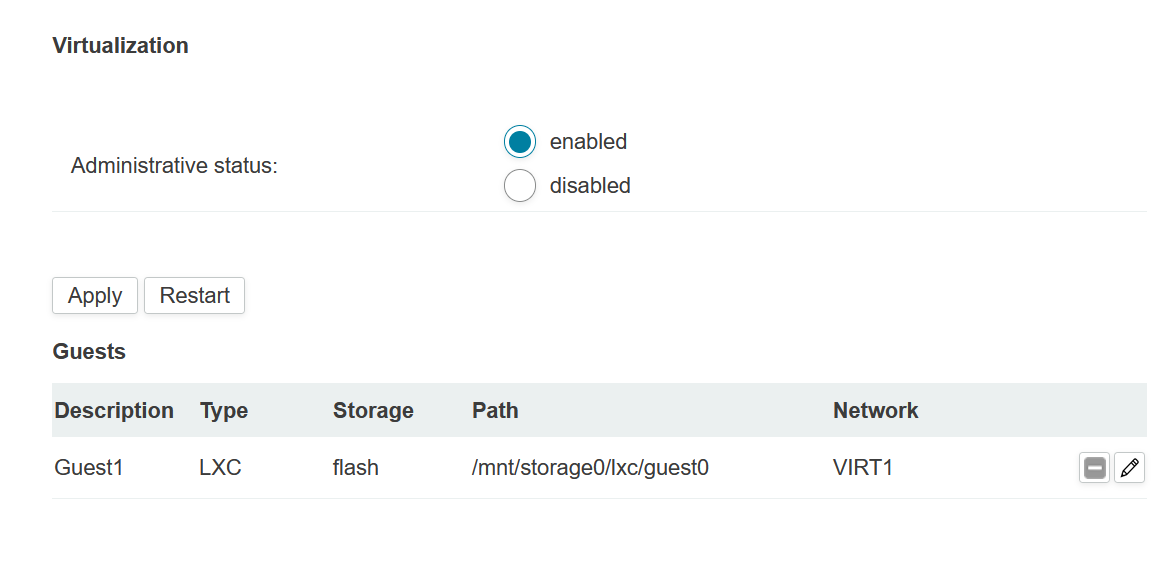
- Transfer the downloader container (you can use WinSCP) to the router and put in
/mnt/storage0/lxc - Unpack the container:
tar –xvf jessie.tar –C ./guest0
- Check access rights using
ls –l
- If the created folder has rights 644, change them* to 755:
chmod 755 -R guest0
- The extracted container contains rootfs directory. You need to copy the content of it to the specified root file system. Using
cd
, go to
guest0/lxc/jessie - Type
lxc-start –n guest0
- Information about container can be accesed by typing
 lxc-info –n guest0 <code> {{ :app-notes:info.png |}}
  - Now you can attach to the container by typing <code> lxc-attach –n guest0

* Later you should remove executable permission bits from some system files, start container in foreground mode
lxc-start –F –n guest0
to get more Information
Installing nano/vim editor
By default, no text editor is installed. I recommend installing two most popular editors, namely vim and nano.
Being attached to the container (root@jessie:~# displayed in the left corner of the CLI), type
apt-get install <name>
,where <name> is either 'vim' or 'nano'.
When a line similar to the following appears: After this operation, 27.9 MB of additional disk space will be used. Do you want to continue? [Y/n], type 'y' and confirm by pressing enter.
Hello World in C
- First of all we need to install gcc: GNU Compiler Collection
- At the beginning, update the packages by typing
apt-get update
- Subsequently install the compiler by typing
apt-get install gcc
- Now create and open a .c file using nano editor
nano hello.c
- Save it using Ctrl + O (German keyboard: Strg + O)
- Exit using Ctrl + X (German keyboard: Strg + X)
- Compile the program using gcc
gcc hello.c -o hello
- Type
ls -l
- The created file has rights 644. Change it to 755
chmod 755 hello
- Type
./hello
to run the program
Hello World shell script
- Create and open file using nano editor
nano helloBash
- Type following code:
- helloBash
#!/bin/bash
echo "Hello World"
- Save it using Ctrl + O (German keyboard: Strg + O)
- Exit using Ctrl + X (German keyboard: Strg + X)
- Type
ls -l
- The created file has rights 644. Change it to 755
chmod 755 helloBash
- Type
./helloBash
to run the program
Hello World in Python
- First of all we need to install Python
- At the beginning, update the packages by typing
apt-get update
- Subsequently install Python by typing
apt-get install python
- Create and open a .py file using nano editor
nano helloPt.py
- Type following code:
- helloPt.py
print "Hello World"
- Save it using Ctrl + O (German keyboard: Strg + O)
- Exit using Ctrl + X (German keyboard: Strg + X)
- Run the program using
python helloPt.py